Aeropress coffee has quickly become a favorite among coffee enthusiasts and professionals alike, particularly in Asia, where the specialty coffee market is expanding rapidly.
Known for its versatility and simplicity, the Aeropress is a compact, lightweight device allowing a wide range of brewing methods.
Whether you prefer a strong espresso-like shot or a smoother, drip-style coffee, the Aeropress can deliver a quality cup in just a few minutes. This is the main reason you must know how to make AeroPress coffee.
What sets Aeropress apart is its ability to produce a clean, flavorful brew with minimal effort consistently.
This ease of use has made it a popular choice for home baristas, cafes, and restaurants looking to offer a premium coffee experience without investing in expensive equipment.
In Asia, the demand for specialty coffee is growing rapidly, particularly in countries like Japan, South Korea, and Singapore; Aeropress coffee is being added to coffee shop menus to meet customers’ evolving tastes.
Moreover, Aeropress coffee’s affordability makes it an attractive option for businesses looking to optimize their coffee ranges without compromising quality.
Whether you’re serving a busy crowd in a bustling city, showcasing your products in coffee trade shows, or catering to a more niche market, Aeropress provides a flexible and efficient way to deliver excellent coffee.
It aligns with the growing trend towards premium yet accessible coffee experiences in the region.
What is Aeropress Coffee?
Aeropress coffee is a unique and versatile brewing method that has gained popularity for producing a clean, flavorful cup of coffee with minimal effort.
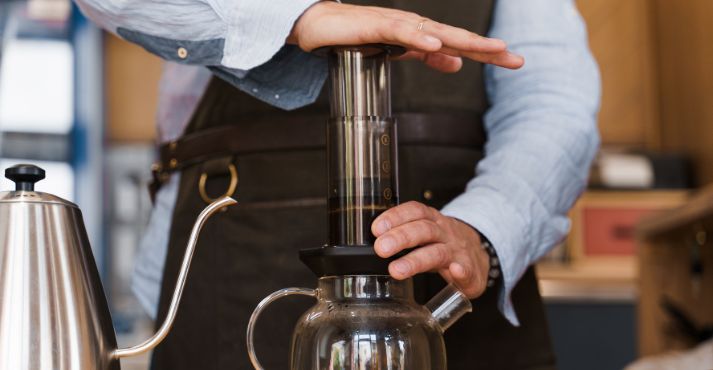
The Aeropress is a simple, portable device with two plastic cylinders that combine to create a chamber for brewing coffee.
Unlike traditional brewing methods, the Aeropress uses air pressure to force hot water through coffee grounds, resulting in a quick and efficient extraction.
This process allows for a wide range of brewing styles, from espresso-like shots to drip-style coffee, making it a favorite among casual coffee drinkers and professionals.
The Aeropress was invented in 2005 by an American engineer and inventor, Alan Adler.
Adler, also known for inventing the Aerobie flying disc, designed the Aeropress to solve the everyday challenges of brewing coffee, including long brewing times and inconsistent flavors often associated with traditional methods.
His goal was to create a device that was simple, fast, and capable of producing consistently great coffee.
Since its invention, the Aeropress has become a staple in the coffee industry, particularly in the specialty coffee sector.
Its portability and ease of use have made it popular for home brewing and among travelers, campers, and coffee professionals.
Why Choose Aeropress?
Due to its numerous benefits, the Aeropress is a popular choice for coffee enthusiasts and professionals. Its portability makes it ideal for home use and on-the-go brewing, allowing users to enjoy high-quality coffee wherever they are.
The Aeropress is also known for its quick brewing process for any type of coffee. It can produce a rich, flavorful cup in just a few minutes, perfect for busy mornings or coffee rituals.
One of the key advantages of the Aeropress is its ability to extract a rich and full-bodied flavor with minimal bitterness, thanks to its unique use of air pressure during brewing. This method allows for a smooth, clean cup of coffee that highlights the nuances of the beans.
The Aeropress has earned several recognitions, including recognition in the World Aeropress Championship, where baristas and coffee enthusiasts compete to showcase the best brewing techniques using the device.
This recognition highlights Aeropress’s status as a respected and versatile tool in the coffee world.
Getting Equipped: The Aeropress Essentials
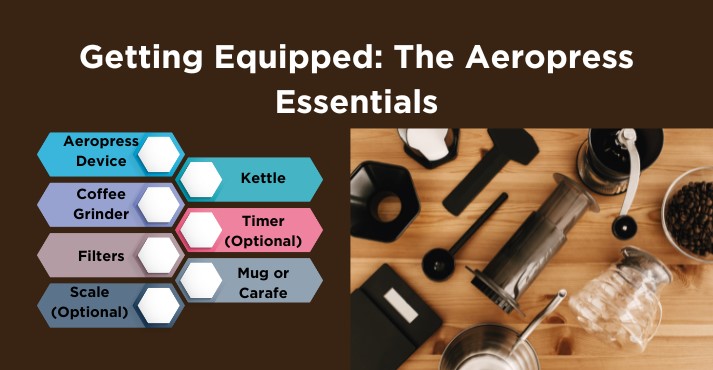
The right tools are crucial to brew the perfect cup of Aeropress coffee. Here’s a list of the essential items you’ll need:
- Aeropress Device: The Aeropress is a compact and versatile brewing device that allows multiple brewing styles, from espresso-like shots to smooth, drip-style coffee.
- Coffee Grinder: A burr grinder is highly recommended as it provides consistent grind sizes, which are crucial for achieving optimal extraction. Freshly ground coffee is critical to unlocking the full flavor potential of your beans.
- Filters: The Aeropress typically uses paper filters, which are easy to use and help produce a clean cup with minimal sediment. However, metal filters are also available for those who prefer a fuller-bodied brew with more oils and micro-grounds.
- Scale (Optional): A scale is not a must, but it’s a helpful tool for ensuring precise coffee-to-water ratios, which can significantly impact the consistency and quality of your brew.
- Kettle: You’ll need a kettle to heat your water. A gooseneck kettle is ideal for better control over the water flow, but any kettle will do the job.
- Timer (Optional): Timing your brew can help you achieve consistent results, especially when experimenting with different recipes.
- Mug or Carafe: You’ll need a sturdy mug or carafe to catch your freshly brewed coffee. The Aeropress can brew directly into your favorite mug, making the process quick and convenient.
By assembling these essentials, you’ll be well-equipped to start exploring the world of Aeropress coffee and enjoying consistently excellent results.
The Grind is Key: Choosing the Perfect Size
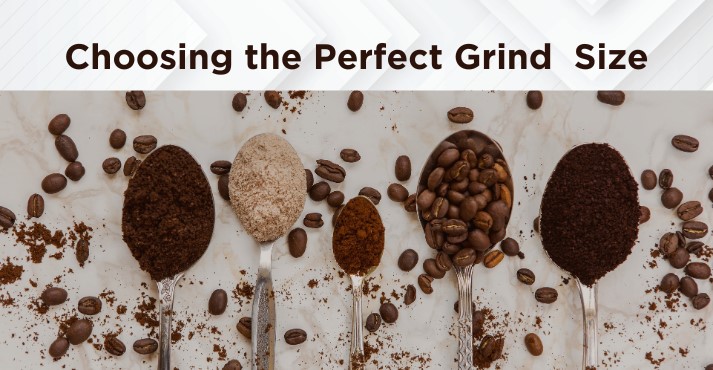
When brewing with an Aeropress, the grind size of your coffee is a critical factor that directly affects your brew’s flavor and overall quality.
The Aeropress is a versatile device that can produce a range of coffee styles such as robusta coffee, nitro coffee, and cold brews, but achieving the best results requires using the right grind size.
Medium-fine grind is typically recommended for most Aeropress recipes. This grind size allows for balanced extraction, producing a cup that is neither bitter nor weak.
A medium-fine grind ensures that the water flows through the coffee grounds optimally, extracting the right amount of flavor compounds without over-extraction, which can lead to bitterness or under-extraction, resulting in a sour taste.
By adjusting the grind size, you can tailor the taste of your coffee to your personal preferences.
For instance, if you prefer a lighter, more delicate cup, you might experiment with a slightly coarser grind. This will slow the extraction process, producing a coffee with more subtle flavors and a lighter body.
If you’re after a more potent, more intense brew, a finer grind can help you achieve that. The finer the grind, the quicker the extraction, which tends to produce a bolder, more robust cup.
While a medium-fine grind is a great starting point for Aeropress brewing, don’t hesitate to experiment with different grind sizes to find the perfect balance that suits your taste.
Adjusting the grind size is one of the simplest yet most effective ways to explore your coffee’s full range of flavors.
Brewing Magic: A Step-by-Step Guide
The Aeropress is celebrated for its versatility, offering different brewing methods that allow you to customize your coffee experience.
Two popular methods are the Standard Method and the Inverted Method. Each has steps, and both can yield exceptional results depending on your taste preferences.
Below, we’ll guide you through both processes, including critical details like water temperature, coffee-to-water ratio, and brewing time.
Standard Method
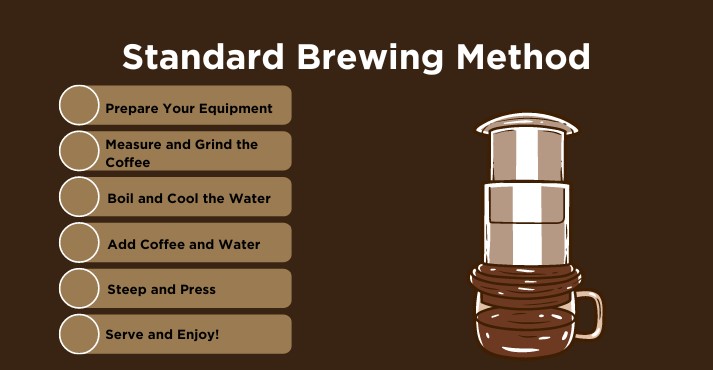
The Standard Method is the original way of brewing with the Aeropress. It’s simple and quick and produces a clean, bright cup of coffee.
- Prepare Your Equipment: Start by assembling your Aeropress, placing a paper filter in the cap, and attaching it to the chamber. Pre-wet the filter with hot water to eliminate any papery taste and to warm up your mug.
- Measure and Grind the Coffee: Use about 14-18 grams of coffee (approximately 1-2 Aeropress scoops), ground to a medium-fine consistency. Adjust the amount of coffee depending on how strong you want your brew.
- Boil and Cool the Water: Heat your water to around 80-85°C (175-185°F). This slightly lower temperature helps to extract a well-balanced flavor without over-extracting the bitter compounds.
- Add Coffee and Water: Place the Aeropress on your mug, then add the ground coffee to the chamber. Pour 200-220 ml of water, starting the timer as you pour. Stir the mixture for 10 seconds to ensure all grounds are fully saturated.
- Steep and Press: Let the coffee steep for 1-1.5 minutes. After steeping, attach the plunger and press down gently but steadily. The pressing should take about 20-30 seconds. Stop pressing when you hear a hissing sound—your coffee is ready.
- Serve and Enjoy: Remove the Aeropress from your mug, unscrew the cap, and discard the used coffee grounds and filter. Give your coffee a gentle stir, and enjoy!
Inverted Method
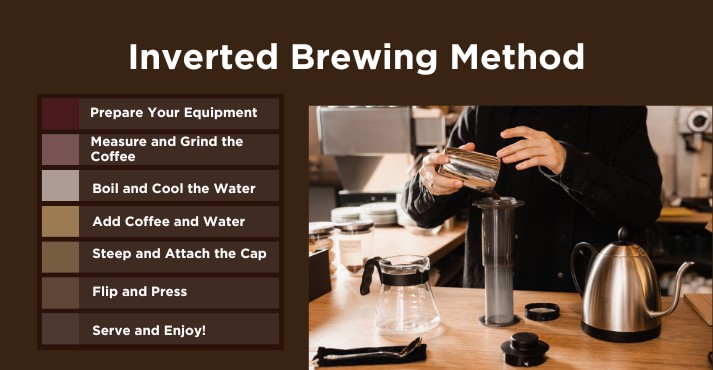
The Inverted Method is a variation that allows for more control over the brewing process. It’s particularly favored for producing a richer, more full-bodied cup.
- Prepare Your Equipment: Start by placing the plunger inside the chamber and flipping the Aeropress upside down so the plunger is on the bottom and the open end is facing up. Place a paper filter in the cap and set it aside.
- Measure and Grind the Coffee: Use 14-18 grams of coffee, ground to a medium-fine consistency. The amount of coffee can be adjusted depending on your preference for strength.
- Boil and Cool the Water: Heat your water to 85-90°C (185-195°F), slightly hotter than the Standard Method. This method can handle more heat due to the increased contact time.
- Add Coffee and Water: Add the ground coffee to the inverted chamber. Pour 200-220 ml of water, ensuring all grounds are evenly saturated. Stir the mixture for 10-15 seconds to mix thoroughly.
- Steep and Attach the Cap: Let the coffee steep for 5-2 minutes. During this time, attach the cap with the pre-wetted filter to the chamber.
- Flip and Press: Carefully flip the Aeropress onto your mug, holding the chamber and the plunger to prevent spills. Press down gently but steadily for 20-30 seconds until you hear the hissing sound.
- Serve and Enjoy: Once brewed, remove the Aeropress, discard the filter and grounds, and enjoy your rich, full-bodied coffee.
The Standard and Inverted Methods offer unique approaches to brewing with the Aeropress. The Standard Method is quick and straightforward, perfect for those who prefer a bright and clean cup.
The Inverted Method offers more control over brewing, resulting in a fuller, richer flavor. Experimenting with these methods lets you discover the perfect brew to suit your taste.
Tips for Perfecting Your Aeropress Coffee

By experimenting with different aspects of the brew, you can customize your coffee to match your preferences perfectly.
Here are some tips to help you improve your Aeropress brewing game.
Experiment with Ratios
The coffee-to-water ratio is one of the most crucial factors in determining the strength and flavor of your brew. Adjusting the ratio allows you to explore different taste profiles:
- Standard Ratio (1:15): This ratio, using about 14-18 grams of coffee to 200-220 ml of water, produces a well-balanced cup with a clean, bright flavor.
- Stronger Brew (1:10): For a more intense coffee, increase the coffee dose to 18-20 grams for the same amount of water. This results in a richer, more robust flavor.
- Lighter Brew (1:17 or 1:18): If you prefer a milder cup, use a slightly lower dose of coffee, around 12-14 grams, for the same water volume. This creates a smoother, more delicate flavor.
By experimenting with these ratios, you can find the perfect balance that suits your palate.
Adjust Grind Size
Grind size significantly affects how your coffee extracts, directly impacting your brew’s flavor and overall quality.
The Aeropress generally works best with a medium-fine grind, but there’s room for experimentation:
- Coarser Grind: Using a coarser grind can lead to a slower extraction, resulting in a lighter, more delicate cup. This is ideal if you’re looking for subtle flavors and a more tea-like body.
- Finer Grind: A finer grind increases the surface area of the coffee, leading to faster extraction and a more robust, more concentrated flavor. Be cautious, though—too fine a grind can lead to over-extraction, causing bitterness.
Different beans may require slight adjustments to the grind size to achieve optimal extraction. A good rule of thumb is to start with a medium-fine grind and adjust based on taste.
Play with Brew Time
Brew time is another variable that can dramatically change the taste of your coffee. The Aeropress is unique in that it allows for flexibility in this area:
- Shorter Brew Time (1-1.5 minutes): A shorter brew time generally produces a brighter, more acidic cup with a lighter body. This is great for highlighting the nuanced flavors of single-origin beans.
- Longer Brew Time (2-3 minutes): Extending the brew time results in a fuller-bodied coffee with more profound, more developed flavors. This can be ideal for those who prefer a more robust and intense cup.
Experimenting with brew times allows you to customize the strength and flavor of your coffee to your liking.
Water Temperature
Water temperature is crucial for controlling the extraction process. The ideal range for Aeropress brewing is typically between 175°F and 205°F (80°C – 96°C):
- Lower Temperature (175°F – 185°F): Using slightly cooler water can result in a smoother, more balanced cup, as it reduces the extraction of bitter compounds.
- Higher Temperature (190°F – 205°F): Hotter water speeds up extraction, which can lead to a bolder, more robust flavor. However, be cautious, as too high a temperature can cause over-extraction, leading to bitterness.
Checking how temperature impacts your brew allows you to fine-tune your coffee’s flavor profile. As a general guide, starting with water around 185°F and adjusting based on your taste preferences can help you find the perfect balance.
By experimenting with variables such as ratios, grind size, brew time, and water temperature, you can unlock the full potential of your Aeropress, creating a personalized coffee experience that is truly your own.
Frequently Asked Questions (FAQs)
What is AeroPress’s ratio of coffee to water?
The typical coffee-to-water ratio for AeroPress is 1:15, meaning about 14-18 grams of coffee to 200-220 ml of water, but this can be adjusted for taste.
How long does it take to soak coffee in AeroPress?
Soak the coffee in the AeroPress for about 1 to 2 minutes, depending on your desired strength and flavor profile.
Why are there 4 numbers on AeroPress?
The 4 numbers on the AeroPress correspond to different water levels, helping you measure the amount of water to add for various brewing methods and strengths.
Conclusion
The AeroPress is a versatile, easy-to-use coffee maker that has earned a loyal following among coffee enthusiasts.
Whether you’re new to coffee brewing or a seasoned pro, understanding how to make Aeropress coffee can help you enjoy the best cup.
The AeroPress offers a wide range of possibilities for experimentation, from adjusting grind sizes and brewing times to playing with coffee-to-water ratios.
Its portability, quick brewing time, and ability to produce a rich, flavorful cup make it a standout choice for those who value convenience without sacrificing quality.
Whether you’re brewing at home, in the office, or on the go, the AeroPress allows you to enjoy a delicious cup of coffee tailored to your taste.
AeroPress coffee is the perfect combination of simplicity and versatility, making it essential for any coffee lover.