Is latte art just fancy decoration, or does it impact the coffee experience? Suppose you’ve ever sipped a cappuccino topped with a perfect heart or admired the swirl of a Rosetta on your morning latte. In that case, you might have wondered this yourself.
While latte art certainly adds a visual charm to your cup, it’s more than just a pretty picture. The skillful blending of steamed milk and espresso doesn’t just create beautiful designs; it can also boost the taste and texture of your coffee.
So, what is latte art, and why has it become such an integral part of coffee culture? Let’s explore latte art, from its basics to its impact on your daily cup of coffee.
Essential Tools and Ingredients for Latte Art
Creating stunning latte art requires skill, the right tools, and ingredients. Whether you’re a beginner or an experienced barista, having the right equipment and knowing how to use it can make all the difference in achieving those beautiful designs.
Let’s dive into the essential tools and ingredients to master latte art.
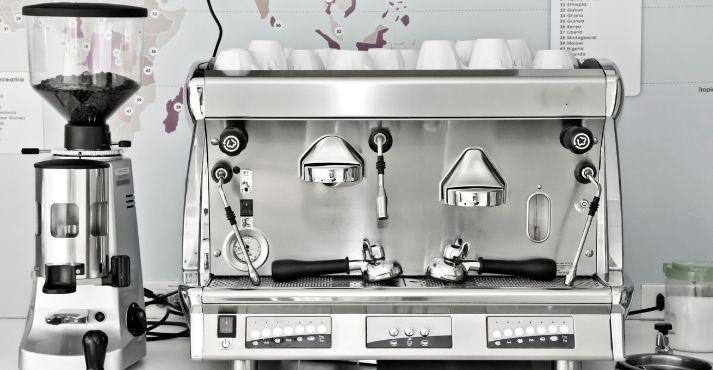
1. Espresso Machine
A high-quality espresso shot is the foundation of any good latte art, making an espresso machine the most crucial tool in your arsenal.
A good espresso machine should be able to maintain consistent pressure and temperature, as these factors are key to extracting the perfect espresso shot.
Look for machines with a sturdy build, a reliable pump, and an adjustable steam wand. The steam wand is essential for frothing milk to the right texture, a step that directly impacts the quality of your latte art.
Investing in a quality espresso machine ensures that your espresso art has a robust and rich foundation.
2. Milk Frother or Steam Wand
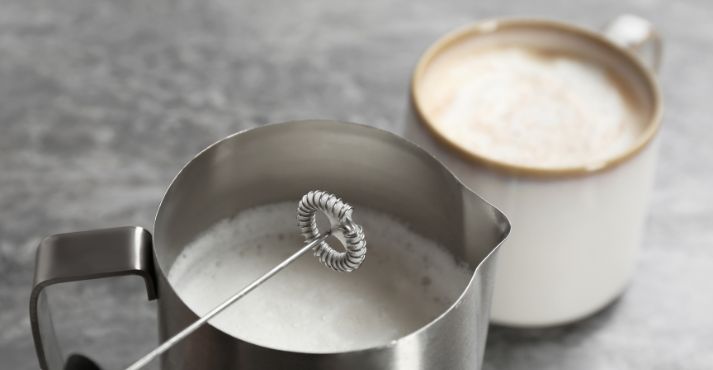
A milk frother or steam wand is essential for creating the microfoam necessary for latte art. Several different options are available, depending on your needs and budget.
A built-in steam wand on an espresso machine is ideal because it allows you to control the texture of the milk with precision. If your machine doesn’t have a steam wand, a standalone milk frother can be a good alternative.
Handheld frothers are affordable and easy to use, but they might not produce the smooth, velvety foam that a steam wand can.
For the best results in latte art, aim for a frother or steam wand that can create microfoam—milk with tiny bubbles that gives your coffee that creamy, silky texture that is essential for perfect coffee designs.
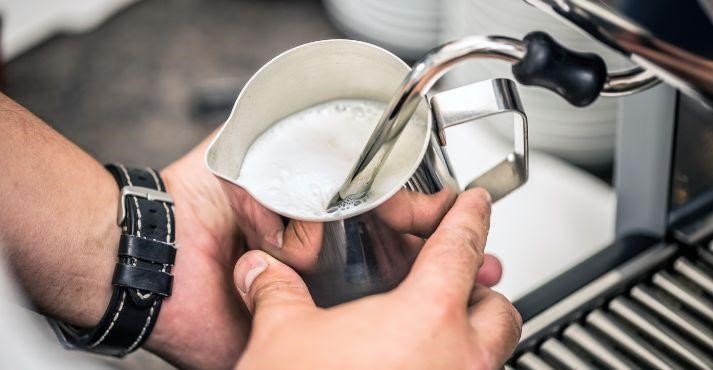
3. Milk Pitcher

The milk pitcher might seem simple, but its shape and size are crucial for making precise latte art. A good milk pitcher should have a narrow spout, allowing you to control the milk flow as you pour it into the espresso.
This control is what lets you create intricate designs, like hearts or tulips, with ease. The size of the pitcher is also important; it should be large enough to froth the right amount of milk but not so large that it’s challenging to handle.
Stainless steel pitchers are popular because they’re durable and easy to clean, making them a staple in any coffee enthusiast’s toolkit.
4. Fresh Espresso Beans
The quality of your latte art also depends heavily on the espresso beans you use. Fresh, high-quality beans significantly impact your coffee’s taste and appearance.
Fresh beans have a richer flavor and produce a better crema—the golden layer of foam on top of an espresso shot, which is essential for latte art. When choosing beans, look for those freshly roasted and suited to the types of coffee you enjoy.
Whether you prefer a dark roast with a strong flavor or a lighter roast with fruity notes, fresh beans will always be the key to a good espresso.
5. Milk
The type of milk you use is another important factor in creating excellent latte art. Dairy milk, particularly whole milk, is often preferred because of its high-fat content, which helps create the smooth microfoam needed for intricate designs.
However, several alternatives work well for latte art if you prefer non-dairy options. Oat and almond milk are popular choices because they froth well and have a creamy texture. Remember that non-dairy milk may require more practice to achieve the perfect foam consistency.
Experimenting with different types of coffee and milk can help you find the perfect combination for your latte art.
The Secret Ingredient: Understanding Milk Frothing
Creating beautiful latte art isn’t just about the design but the science behind the perfect milk froth. Whether preparing for a coffee trade show or simply making your morning cup of robusta coffee, getting the froth right will elevate your coffee foam art to the next level.
The secret ingredient to mastering latte art is understanding milk frothing.
1. Milk Quality and Fat Content
The quality of the milk you use is essential for producing the kind of microfoam that makes latte art possible. Fresh, high-quality milk with a good fat content is the best choice. Whole milk is often preferred because its higher fat content creates a creamier, more stable foam.
This richness in fat helps maintain the smooth texture ideal for cappuccino art and other latte designs. Remember that fresh milk with the right fat content can make the difference between a good and a great cup of espresso art when choosing milk for frothing.
2. The Power of Steam
The magic of milk frothing happens when steam is introduced into the milk. Steaming milk serves two purposes: it heats and infuses it with air, creating tiny bubbles. As the steam wand forces steam into the milk, it breaks down the fat molecules, allowing them to mix with air and create foam.
This process is the foundation of coffee foam art. It is vital to introduce just the proper air to produce a velvety microfoam without creating large, unwanted bubbles. Mastering steam is critical to learning how to do latte art effectively.
3. Microfoam vs. Big Bubbles
Not all milk foam is created equal. Regarding latte art, smooth, micro-textured foam is your best friend. Microfoam consists of tiny, uniform bubbles that give the milk a silky texture and glossy sheen.
This foam pours beautifully into coffee designs, allowing you to create intricate patterns like rosettas, hearts, and tulips. On the other hand, large bubbles can ruin the consistency of the milk and make your latte designs look rough and unrefined.
Large bubbles are usually the result of introducing too much air too quickly or from using milk that is not fresh. The goal is to achieve a balance where the milk is frothy enough to create easy latte art but still smooth enough to blend seamlessly with the espresso.
4. Frothing Techniques
Depending on the equipment you have, there are different techniques for frothing milk. Manual frothing with a steam wand is the traditional method and allows for greater control over the process.
To manually froth milk, you start by submerging the steam wand just below the surface to introduce air. Once you have enough foam, move the wand deeper into the milk to heat it evenly. This technique requires practice but is essential for achieving the perfect microfoam.
Using an automatic espresso machine with a built-in steamer is more straightforward. These machines are designed to froth the milk at the press of a button, making it easier for beginners to produce consistent results.
However, even with an automatic steamer, it’s important to pay attention to the texture of the foam. The more you practice, the better you’ll get at creating the ideal froth for coffee art.
3 Key Techniques in Latte Art
Now, let’s get into the nitty-gritty of latte art. It’s not all magic; there are techniques that baristas use to create those stunning designs on your latte.
1. Free Pour: This is the classic technique where the barista pours frothy milk directly onto the espresso. By controlling the flow and height of the pour, they create various patterns like hearts, rosettes, and tulips. It’s like painting with milk.
2. Etching: Etching involves using tools like toothpicks or latte art pens to draw intricate designs on the milk’s surface. With careful etching, Baristas can turn a plain-looking latte into a work of art.
3. Layering: With layering, different densities of milk foam are created. By pouring these layers at various angles, baristas can craft 3D-like designs, giving depth to the artwork.
Each of these techniques has its charm and allows baristas to express their creativity. Whether it’s the elegance of free pour, the precision of etching, or the depth of layering, mastering these techniques is key to becoming a latte art maestro.
Simple Latte Art Designs for Beginners
If you’re new to latte art, don’t worry—several simple designs are perfect for beginners to practice and master.
With patience and the proper technique, you can create beautiful coffee designs that will impress your friends and elevate your coffee experience. Here’s a guide to four basic latte designs to get you started.
1. The Rosetta

The Rosetta is a classic latte art design that resembles the shape of a fern or a leaf.
- Start by slowly pouring the steamed milk into the center of your espresso, forming a small white dot.
- Wiggle the pitcher back and forth as you move it from one side of the cup to the other, creating the “petals” of the fern-like pattern.
- Finish the design by lifting the pitcher slightly, drawing a line through the pattern’s center, and pulling it back toward you to form the stem.
This design is ideal for practicing the control and flow needed for more complex coffee art.
2. The Heart

The Heart is one of the most popular and easy latte art designs, making it a great starting point for beginners.
- Begin by slowly pouring the milk into the center of the cup, creating a small white dot.
- Continue pouring in a steady stream, keeping the pitcher close to the surface.
- Lift the pitcher slightly and move it back to create a slight wiggle, then drag the pitcher away in a swift, straight motion to form the point of the heart.
This simple yet charming design will surely bring a smile to anyone’s face.
3. Tulip

The Tulip is another fundamental latte art design that builds on the skills you’ve learned from the Rosetta and Heart.
- Start by pouring a small amount of milk into the center of the cup to form a white dot.
- Repeat the process two or three times, stacking the dots on each other.
- Finish the design by dragging the pitcher back through the dots straight to form the stem.
This design is slightly more complex but still achievable for beginners with some practice.
4. The Swan

The Swan is a more advanced design, but it’s a fun challenge once you’ve mastered the basics.
- Begin by creating a simple Rosetta design.
- Instead of finishing with a straight line, continue the pour to form the neck and head of the Swan.
- Carefully control the milk flow to create the delicate curves of the Swan’s neck and body.
This elegant design showcases your growing latte art skills and impresses your coffee-loving friends.
Conclusion
What is latte art? It’s much more than just a decoration on your coffee; it’s a blend of skill, creativity, and an understanding of the science behind milk frothing.
From simple designs like hearts and rosettas to more intricate patterns like swans, latte art adds a personal touch to every cup.
Whether you’re a beginner just starting or an experienced barista, mastering latte art can enhance your coffee’s visual appeal and taste.
So, grab your tools, practice your pours, and soon, you’ll craft beautiful latte designs that turn every coffee moment into a work of art.